boardgamevideo
  • Trending
  • Videos
  • Games
  • Channels
  • Lists
  • Shorts

Explore

  • Home
  • Trending
  • Channels
  • Videos
  • Games
  • Lists
  • Shorts
  • Conventions
  • Year in Review

Browse by type

  • Reviews
  • How to play
  • Playthroughs
  • Unboxing
  • Top 100 lists
  • Featured videos
  • Trending this week
  • Rising games
  • Games with fresh review perspectives

Information

  • About
  • Contact
  • Terms & Conditions
  • Privacy Policy

© 2022–2026 BoardGameVideo.com

Powered by BGG
  • Videos
  • Trending
  • Shorts
  • Channels
  • Games
  • Lists
Aug 2, 2023·Playthrough·01:14:39·0·Watch on YouTube

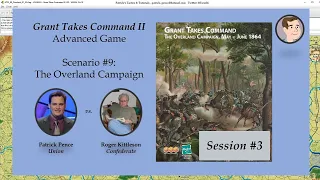
Grant Takes Command II - Scenario #9 - The Overland Campaign, Session 3

Patrick's Tactics & Tutorials

Patrick's Tactics & Tutorials

Watch “Grant Takes Command II - Scenario #9 - The Overland Campaign, Session 3,” a gameplay video on BoardGameVideo.

Description provided by Patrick's Tactics & Tutorials on YouTube:
My virtual tip jar: https://ko-fi.com/patricks_tactics (Please support if you enjoy the content!) Session 3: Turns 5 - 6 (May 8 - 9, 1864) Having completed all of the right Basic Game scenarios for Grant Takes Command II, and with the continued encouragement of our viewers, we now embark on another Advanced Game! This is our third attempt at capturing a campaign format playing against each other, so we hope you enjoy the narrative. For this first campaign game, Patrick will play the Union (USA), and Roger will play the Confederates. (CSA). Scenario #9: The Overland Campaign: This scenario simulates Grant's 1864 summer offensive from Culpeper to the gates of Richmond via the Wilderness, Spotsylvania, and Cold Harbor. GAME LENGTH: Up to 40 turns, May 4 to June 12, 1864. https://en.wikipedia.org/wiki/Overland_campaign

Explore more Videos

  1. Grant Takes Command II - Scenario #5 - Sheridan Rides South1:21:10
    Grant Takes Command II - Scenario #5 - Sheridan Rides South
    Patrick's Tactics & Tutorials
  2. Avalon: The Riven Veil Review — The Oathsworn devs made an Area Control!52:57
    Avalon: The Riven Veil Review — The Oathsworn devs made an Area Control!
    Shelfside
  3. Grant Takes Command II - Scenario #6 - Strike Them A Blow!, Session 11:11:04
    Grant Takes Command II - Scenario #6 - Strike Them A Blow!, Session 1
    Patrick's Tactics & Tutorials
  4. Grant Takes Command II - Scenario #4 - Bloody Spotsylvania - Rematch, Session 31:11:09
    Grant Takes Command II - Scenario #4 - Bloody Spotsylvania - Rematch, Session 3
    Patrick's Tactics & Tutorials
  5. Grant Takes Command II - Scenario #8 - Trevilian Station1:05:57
    Grant Takes Command II - Scenario #8 - Trevilian Station
    Patrick's Tactics & Tutorials
  6. Grant Takes Command II - Scenario #6 - Strike Them A Blow! - Rematch, Session 259:59
    Grant Takes Command II - Scenario #6 - Strike Them A Blow! - Rematch, Session 2
    Patrick's Tactics & Tutorials
  7. On To Richmond II (GCACW) - First Look21:38
    On To Richmond II (GCACW) - First Look
    Hexed And Countered
  8. Grant Takes Command II - Scenario #1 - The Battle of the Wilderness1:43:27
    Grant Takes Command II - Scenario #1 - The Battle of the Wilderness
    Patrick's Tactics & Tutorials
  9. Roads to Gettysburg II - Scenario #4 - The First Day at Gettysburg1:05:30
    Roads to Gettysburg II - Scenario #4 - The First Day at Gettysburg
    Patrick's Tactics & Tutorials
  10. Roads to Gettysburg II - Scenario #2 - Stuart Rides North - Rematch53:53
    Roads to Gettysburg II - Scenario #2 - Stuart Rides North - Rematch
    Patrick's Tactics & Tutorials
  11. Grant Takes Command II - Scenario #6 - Strike Them A Blow!, Session 258:22
    Grant Takes Command II - Scenario #6 - Strike Them A Blow!, Session 2
    Patrick's Tactics & Tutorials
  12. Roads to Gettysburg II - Scenario #3 - The Confederate High Tide32:37
    Roads to Gettysburg II - Scenario #3 - The Confederate High Tide
    Patrick's Tactics & Tutorials
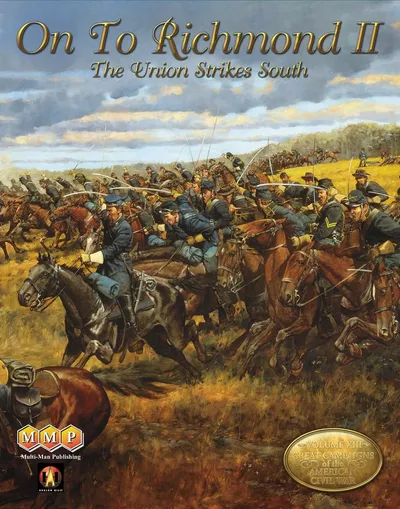
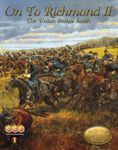
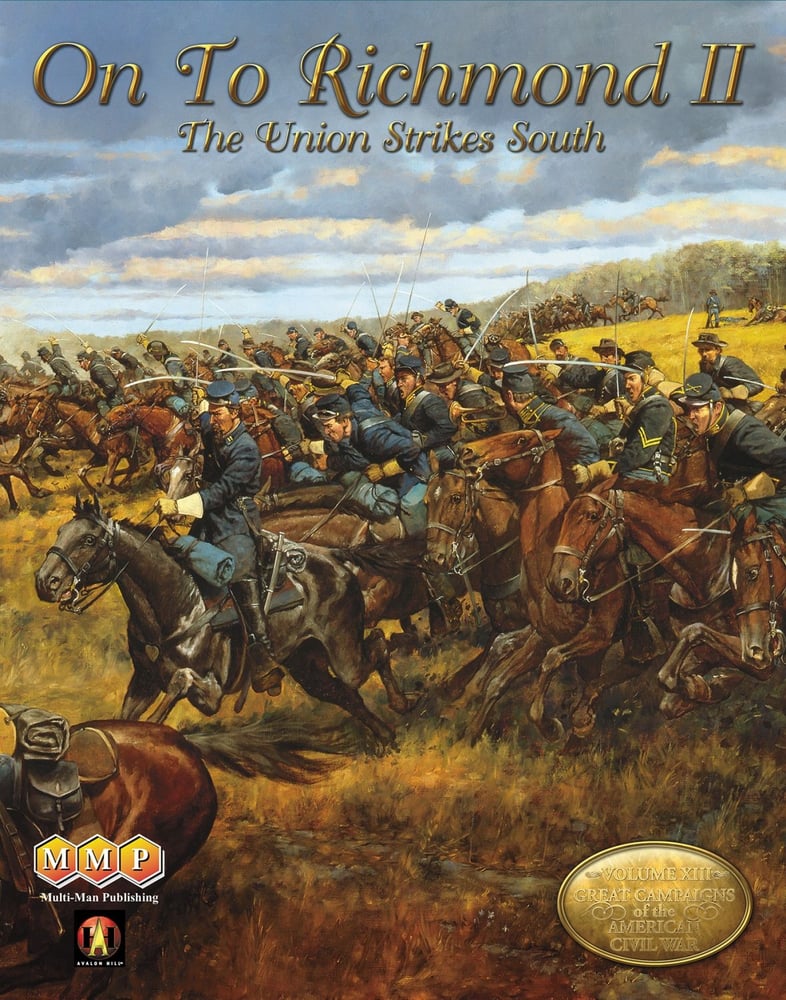
On to Richmond II: The Union Strikes South

On to Richmond II: The Union Strikes South

2023·Joseph M. Balkoski, Ed Beach, Chris Withers

Videos
36
Creators
6

Playthroughs. On to Richmond II: The Union Strikes South is covered on BoardGameVideo.com by 33 recorded sessions and 3 unboxings.

1 - 2 players
60 - 1200 min
Heavy weight: Expect a long teach

About On to Richmond II: The Union Strikes South, from BoardGameGeek:

On to Richmond II: The Union Strikes South covers some of the most famous campaigns of the Civil War in a single module for the award-winning Series: Great Campaigns of the American Civil War (Avalon Hill/MMP) (GCACW) series. Two of the campaigns in this module have been revised, repackaged, and rebalanced for improved play; and the third is entirely new: On To Richmond II (which covers the 1862 Richmond Campaign) has had the Basic Game scenarios rebalanced as needed and modifications made to the rules and victory conditions for the Advanced Game scenario. Grant Takes Command II (which covers the 1864 Overland Campaign) has had the various basic and advanced game scenarios revised as needed. The Petersburg Campaign (which covers the 1864-1865 Petersburg Campaign) is an entirely new module that covers the months of battles, mostly in the open field, that started when Grant marched across the James River in June 1864 and ended with the defeat of the Confederates at Five Forks in April 1865. The four maps included are painted by original map artist Charlie Kibler and have been significantly revised to include all the latest GCACW terrain types including hills, swamps, dams, trails and landings. New map area has been added to cover the western portion of the Petersburg battles. The military unit counters have been redesigned by Charlie Kibler to harken back to the counters in the original games in the series but with a more modern graphical treatment. Richmond & Petersburg Campaigns includes a massive collection of twenty-five Basic Game scenarios and seven Advanced Game campaigns, divided as shown between the three modules: On To Richmond II includes one new Basic Game scenario, the seven original Basic Scenarios redesigned and rebalanced, and the original Advanced Game campaign scenario extensively revised. Grant Takes Command II includes the eight original Basic Scenarios rebalanced as needed and the four original Advanced Game campaigns. Note: the two grand campaigns require the Stonewall In The Valley maps which are not included. The Petersburg Campaign includes nine Basic Game scenarios and two Advanced Game scenarios. -description from the publisher

Designers

Joseph M. Balkoski, Ed Beach, Chris Withers

Artists

Nicolás Eskubi, Charles Kibler, Keith Rocco

Publisher

Multi-Man Publishing

Categories

American Civil WarWargame

Mechanics

Hex GridAction Selection
View on BoardGameGeek ›
On to Richmond II: The Union Strikes South

Explore more videos

Grant Takes Command II - Scenario #5 - Sheridan Rides SouthPlaythrough1:21:10

Grant Takes Command II - Scenario #5 - Sheridan Rides South

Patrick's Tactics & Tutorials

Patrick's Tactics & Tutorials

Avalon: The Riven Veil Review — The Oathsworn devs made an Area Control!Review52:57

Avalon: The Riven Veil Review — The Oathsworn devs made an Area Control!

Shelfside

Shelfside

Grant Takes Command II - Scenario #6 - Strike Them A Blow!, Session 1Playthrough1:11:04

Grant Takes Command II - Scenario #6 - Strike Them A Blow!, Session 1

Patrick's Tactics & Tutorials

Patrick's Tactics & Tutorials

Grant Takes Command II - Scenario #4 - Bloody Spotsylvania - Rematch, Session 3Playthrough1:11:09

Grant Takes Command II - Scenario #4 - Bloody Spotsylvania - Rematch, Session 3

Patrick's Tactics & Tutorials

Patrick's Tactics & Tutorials

Grant Takes Command II - Scenario #8 - Trevilian StationPlaythrough1:05:57

Grant Takes Command II - Scenario #8 - Trevilian Station
Patrick's Tactics & Tutorials

Patrick's Tactics & Tutorials

Grant Takes Command II - Scenario #6 - Strike Them A Blow! - Rematch, Session 2Playthrough59:59
Grant Takes Command II - Scenario #6 - Strike Them A Blow! - Rematch, Session 2
Patrick's Tactics & Tutorials

Patrick's Tactics & Tutorials

On To Richmond II (GCACW) - First LookUnboxing21:38
On To Richmond II (GCACW) - First Look

Hexed And Countered

Hexed And Countered

Grant Takes Command II - Scenario #1 - The Battle of the WildernessPlaythrough1:43:27

Grant Takes Command II - Scenario #1 - The Battle of the Wilderness

Patrick's Tactics & Tutorials

Patrick's Tactics & Tutorials

Roads to Gettysburg II - Scenario #4 - The First Day at GettysburgPlaythrough1:05:30

Roads to Gettysburg II - Scenario #4 - The First Day at Gettysburg

Patrick's Tactics & Tutorials

Patrick's Tactics & Tutorials

Roads to Gettysburg II - Scenario #2 - Stuart Rides North - RematchPlaythrough53:53

Roads to Gettysburg II - Scenario #2 - Stuart Rides North - Rematch

Patrick's Tactics & Tutorials

Patrick's Tactics & Tutorials

Grant Takes Command II - Scenario #6 - Strike Them A Blow!, Session 2Playthrough58:22

Grant Takes Command II - Scenario #6 - Strike Them A Blow!, Session 2

Patrick's Tactics & Tutorials

Patrick's Tactics & Tutorials

Roads to Gettysburg II - Scenario #3 - The Confederate High TidePlaythrough32:37

Roads to Gettysburg II - Scenario #3 - The Confederate High Tide

Patrick's Tactics & Tutorials

Patrick's Tactics & Tutorials

Horror on the Orient Express Review: Cheese It, It's the FezReview23:27

Horror on the Orient Express Review: Cheese It, It's the Fez

The Dice Tower

The Dice Tower

Roads to Gettysburg II - Scenario #5 - The Battle of Gettysburg, part 2Playthrough51:44

Roads to Gettysburg II - Scenario #5 - The Battle of Gettysburg, part 2

Patrick's Tactics & Tutorials

Patrick's Tactics & Tutorials

Unboxing | On to Richmond II (MMP 2023)Unboxing40:41

Unboxing | On to Richmond II (MMP 2023)

Ardwulf's Lair

Ardwulf's Lair

Roads to Gettysburg II - Scenario #5 - The Battle of Gettysburg - Rematch, part 1Playthrough1:25:53

Roads to Gettysburg II - Scenario #5 - The Battle of Gettysburg - Rematch, part 1

Patrick's Tactics & Tutorials

Patrick's Tactics & Tutorials

More On to Richmond II: The Union Strikes South videos

On to Richmond II: The Petersburg Campaign Scenario 1Playthrough17:31

On to Richmond II: The Petersburg Campaign Scenario 1

Wargame Ramble

Wargame Ramble

Grant Takes Command II - Scenario #9 - The Overland Campaign, Session 5Playthrough1:23:44

Grant Takes Command II - Scenario #9 - The Overland Campaign, Session 5

Patrick's Tactics & Tutorials

Patrick's Tactics & Tutorials

Seven Pines: On To Richmond II -- GCACW [Turn 2]Playthrough19:32

Seven Pines: On To Richmond II -- GCACW [Turn 2]

The Counter Corps

The Counter Corps

Seven Pines: On To Richmond II -- GCACW [Turn 1]Playthrough39:54

Seven Pines: On To Richmond II -- GCACW [Turn 1]

The Counter Corps

The Counter Corps

Grant Takes Command II - Scenario #9 - The Overland Campaign, Session 4Playthrough51:06

Grant Takes Command II - Scenario #9 - The Overland Campaign, Session 4

Patrick's Tactics & Tutorials

Patrick's Tactics & Tutorials

On To Richmond II (GCACW) - First LookUnboxing21:38

On To Richmond II (GCACW) - First Look

Hexed And Countered

Hexed And Countered

Grant Takes Command II - Scenario #9 - The Overland Campaign, Session 2Playthrough1:09:02

Grant Takes Command II - Scenario #9 - The Overland Campaign, Session 2

Patrick's Tactics & Tutorials

Patrick's Tactics & Tutorials

Grant Takes Command II - Scenario #9 - The Overland Campaign, Session 1Playthrough1:22:30

Grant Takes Command II - Scenario #9 - The Overland Campaign, Session 1

Patrick's Tactics & Tutorials

Patrick's Tactics & Tutorials

Unboxing | On to Richmond II (MMP 2023)Unboxing40:41

Unboxing | On to Richmond II (MMP 2023)

Ardwulf's Lair

Ardwulf's Lair

On To Richmond II UnboxingUnboxing15:16

On To Richmond II Unboxing

My Own Worst Enemy

My Own Worst Enemy

Grant Takes Command II - Scenario #8 - Trevilian Station - RematchPlaythrough46:41

Grant Takes Command II - Scenario #8 - Trevilian Station - Rematch

Patrick's Tactics & Tutorials

Patrick's Tactics & Tutorials

Grant Takes Command II - Scenario #1 - The Battle of the Wilderness1:43:27

Grant Takes Command II - Scenario #1 - The Battle of the Wilderness

Patrick's Tactics & Tutorials

Patrick's Tactics & Tutorials

Grant Takes Command II - Scenario #6 - Strike Them A Blow!, Session 258:22

Grant Takes Command II - Scenario #6 - Strike Them A Blow!, Session 2

Patrick's Tactics & Tutorials

Patrick's Tactics & Tutorials

Grant Takes Command II - Scenario #7 - Bethesda Church1:00:07

Grant Takes Command II - Scenario #7 - Bethesda Church

Patrick's Tactics & Tutorials

Patrick's Tactics & Tutorials

Grant Takes Command II - Scenario #6 - Strike Them A Blow! - Rematch, Session 11:08:24

Grant Takes Command II - Scenario #6 - Strike Them A Blow! - Rematch, Session 1

Patrick's Tactics & Tutorials

Patrick's Tactics & Tutorials

Grant Takes Command II - Scenario #6 - Strike Them A Blow!, Session 11:11:04

Grant Takes Command II - Scenario #6 - Strike Them A Blow!, Session 1

Patrick's Tactics & Tutorials

Patrick's Tactics & Tutorials

Grant Takes Command II - Scenario #8 - Trevilian Station1:05:57

Grant Takes Command II - Scenario #8 - Trevilian Station

Patrick's Tactics & Tutorials

Patrick's Tactics & Tutorials

Grant Takes Command II - Scenario #6 - Strike Them A Blow! - Rematch, Session 259:59

Grant Takes Command II - Scenario #6 - Strike Them A Blow! - Rematch, Session 2

Patrick's Tactics & Tutorials

Patrick's Tactics & Tutorials

Grant Takes Command II - Scenario #5 - Sheridan Rides South1:21:10

Grant Takes Command II - Scenario #5 - Sheridan Rides South

Patrick's Tactics & Tutorials

Patrick's Tactics & Tutorials

Grant Takes Command II - Scenario #9 - The Overland Campaign, Session 21:09:02

Grant Takes Command II - Scenario #9 - The Overland Campaign, Session 2

Patrick's Tactics & Tutorials

Patrick's Tactics & Tutorials

Grant Takes Command II - Scenario #4 - Bloody Spotsylvania - Rematch, Session 31:11:09

Grant Takes Command II - Scenario #4 - Bloody Spotsylvania - Rematch, Session 3

Patrick's Tactics & Tutorials

Patrick's Tactics & Tutorials

Grant Takes Command II - Scenario #3 - The Race for Spotsylvania55:48

Grant Takes Command II - Scenario #3 - The Race for Spotsylvania

Patrick's Tactics & Tutorials

Patrick's Tactics & Tutorials

Grant Takes Command II - Scenario #2 - Grant Crosses the Rapidan - Rematch, Session 11:09:29

Grant Takes Command II - Scenario #2 - Grant Crosses the Rapidan - Rematch, Session 1

Patrick's Tactics & Tutorials

Patrick's Tactics & Tutorials

Grant Takes Command II - Scenario #2 - Grant Crosses the Rapidan, Session 31:23:31

Grant Takes Command II - Scenario #2 - Grant Crosses the Rapidan, Session 3

Patrick's Tactics & Tutorials

Patrick's Tactics & Tutorials

On to Richmond II: The Petersburg Campaign Scenario 117:31

On to Richmond II: The Petersburg Campaign Scenario 1

Wargame Ramble

Wargame Ramble

Grant Takes Command II - Scenario #7 - Bethesda Church - Rematch1:44:47

Grant Takes Command II - Scenario #7 - Bethesda Church - Rematch

Patrick's Tactics & Tutorials

Patrick's Tactics & Tutorials

Grant Takes Command II - Scenario #4 - Bloody Spotsylvania, Session 31:05:56

Grant Takes Command II - Scenario #4 - Bloody Spotsylvania, Session 3

Patrick's Tactics & Tutorials

Patrick's Tactics & Tutorials

Grant Takes Command II - Scenario #4 - Bloody Spotsylvania, Session 251:06

Grant Takes Command II - Scenario #4 - Bloody Spotsylvania, Session 2

Patrick's Tactics & Tutorials

Patrick's Tactics & Tutorials

Grant Takes Command II - Scenario #4 - Bloody Spotsylvania, Session 11:07:53

Grant Takes Command II - Scenario #4 - Bloody Spotsylvania, Session 1

Patrick's Tactics & Tutorials

Patrick's Tactics & Tutorials

Grant Takes Command II - Scenario #2 - Grant Crosses the Rapidan - Rematch, Session 255:56

Grant Takes Command II - Scenario #2 - Grant Crosses the Rapidan - Rematch, Session 2

Patrick's Tactics & Tutorials

Patrick's Tactics & Tutorials

Grant Takes Command II - Scenario #2 - Grant Crosses the Rapidan, Session 249:48

Grant Takes Command II - Scenario #2 - Grant Crosses the Rapidan, Session 2

Patrick's Tactics & Tutorials

Patrick's Tactics & Tutorials

Grant Takes Command II - Scenario #2 - Grant Crosses the Rapidan, Session #11:09:50

Grant Takes Command II - Scenario #2 - Grant Crosses the Rapidan, Session #1

Patrick's Tactics & Tutorials

Patrick's Tactics & Tutorials

Grant Takes Command II - Scenario #9 - The Overland Campaign, Session 11:22:30

Grant Takes Command II - Scenario #9 - The Overland Campaign, Session 1

Patrick's Tactics & Tutorials

Patrick's Tactics & Tutorials

Grant Takes Command II - Scenario #8 - Trevilian Station - Rematch46:41

Grant Takes Command II - Scenario #8 - Trevilian Station - Rematch

Patrick's Tactics & Tutorials

Patrick's Tactics & Tutorials

Grant Takes Command II - Scenario #5 - Sheridan Rides South - Rematch32:46

Grant Takes Command II - Scenario #5 - Sheridan Rides South - Rematch

Patrick's Tactics & Tutorials

Patrick's Tactics & Tutorials

Grant Takes Command II - Scenario #4 - Bloody Spotsylvania - Rematch, Session 232:26

Grant Takes Command II - Scenario #4 - Bloody Spotsylvania - Rematch, Session 2

Patrick's Tactics & Tutorials

Patrick's Tactics & Tutorials

Grant Takes Command II - Scenario #2 - Grant Crosses the Rapidan - Rematch, Session 342:56

Grant Takes Command II - Scenario #2 - Grant Crosses the Rapidan - Rematch, Session 3

Patrick's Tactics & Tutorials

Patrick's Tactics & Tutorials

Grant Takes Command II - Scenario #4 - Bloody Spotsylvania - Rematch, Session 11:05:35

Grant Takes Command II - Scenario #4 - Bloody Spotsylvania - Rematch, Session 1

Patrick's Tactics & Tutorials

Patrick's Tactics & Tutorials

Grant Takes Command II - Scenario #1 - The Battle of the Wilderness - Rematch1:16:18

Grant Takes Command II - Scenario #1 - The Battle of the Wilderness - Rematch

Patrick's Tactics & Tutorials

Patrick's Tactics & Tutorials

Grant Takes Command II - Scenario #9 - The Overland Campaign, Session 451:06

Grant Takes Command II - Scenario #9 - The Overland Campaign, Session 4

Patrick's Tactics & Tutorials

Patrick's Tactics & Tutorials

Grant Takes Command II - Scenario #9 - The Overland Campaign, Session 51:23:44

Grant Takes Command II - Scenario #9 - The Overland Campaign, Session 5

Patrick's Tactics & Tutorials

Patrick's Tactics & Tutorials

Seven Pines: On To Richmond II -- GCACW [Turn 1]39:54

Seven Pines: On To Richmond II -- GCACW [Turn 1]

The Counter Corps

The Counter Corps

Seven Pines: On To Richmond II -- GCACW [Turn 2]19:32

Seven Pines: On To Richmond II -- GCACW [Turn 2]

The Counter Corps

The Counter Corps

On To Richmond II (GCACW) - First Look21:38

On To Richmond II (GCACW) - First Look

Hexed And Countered

Hexed And Countered

Unboxing | On to Richmond II (MMP 2023)40:41

Unboxing | On to Richmond II (MMP 2023)

Ardwulf's Lair

Ardwulf's Lair

On To Richmond II Unboxing15:16

On To Richmond II Unboxing

My Own Worst Enemy

My Own Worst Enemy

Related Content

More On to Richmond II: The Union Strikes South videos
game

More On to Richmond II: The Union Strikes South videos

channel

More videos from this channel

Home
Videos
Grant Takes Command II - Scenario #9 - The Overland Campaign, Session 3